Monday, September 27, 2010

Roofing 101

With the steel beam and rafters in place, Nick and his crew began putting the plywood sheathing on the roof and erecting the interior walls.  There are many angles to the roof and putting it all together is no small feat.  We are lucky to have such amazing framers.  These guys really know what they are doing and the quality of their work is outstanding.  We couldn’t be happier.
Plywood Caps Our New Roof


Loft-like Angles on the Second Floor Ceiling

Nick, King of the Framers

Initially, we were not going to replace the roof on the old part of the house since it had been reroofed just a few years ago.  We changed our mind and are now glad that we made the decision.  What we found under the asphalt shingles were wood shingles nailed onto random slats of wood.
Dan Tearing Off the Old Roof


Beneath the Shingles


Adding More Support

In the last picture, you can see that additional support beams have been provided where there were none.  Remodeling an old house is much more complex than we had imagined.  The old adage, “they don’t build ‘em like that anymore” is probably a good thing!

Sunday, September 19, 2010

Beam Me Up

Second floor construction began with exterior walls going up.  The house is beginning to take shape.  Now we can begin to see how the new addition will tie to the original structure.  It’s a beautiful day in Boulder and the crew is busy preparing for delivery of a massive steel beam that will support the new roof.

Walls Going Up on the Second Level

Tying Together the Old with the New

Street View of the Second Story

The master bedroom will be located on the second floor along with a bath and an office alcove.

Doors to a Deck, the Office Alcove and Stairwell

Looking Toward the Master Bedroom

Wow.  That is a big beam.  The framers commented that the house is constructed like a commercial building.  I guess we won’t have to worry about those 100 mph winds Boulder occasionally experiences.

The Beam Arrives

Beam Placement

Why We Wear Hard Hats!

With the beam in place, the remainder of the roof is constructed and walls can start going up.

The Beam is Secured in Place

The Beam Runs the Length of the Master Bedroom

Thursday, September 9, 2010

Basement

Not much to see in the basement. It exists only under the new addition so it’s not very large. We feel fortunate to have a basement and the space to accommodate a media room and a bathroom, a workroom, and a mechanical room.

High Ceilings Make the Space Seem Larger

Windowless, the media room will be a cozy spot to watch movies. We’ll have plenty of room for sectional seating and a nice 9‘ wall for a television.  Hmmm, how large of a TV could we fit on that wall?

The Media Room

The window well with double windows provide lots of light in this room and the mechanical room opposite will give us storage space for bulky items.

Workroom Window Well

Tuesday, September 7, 2010

Putting Up Walls

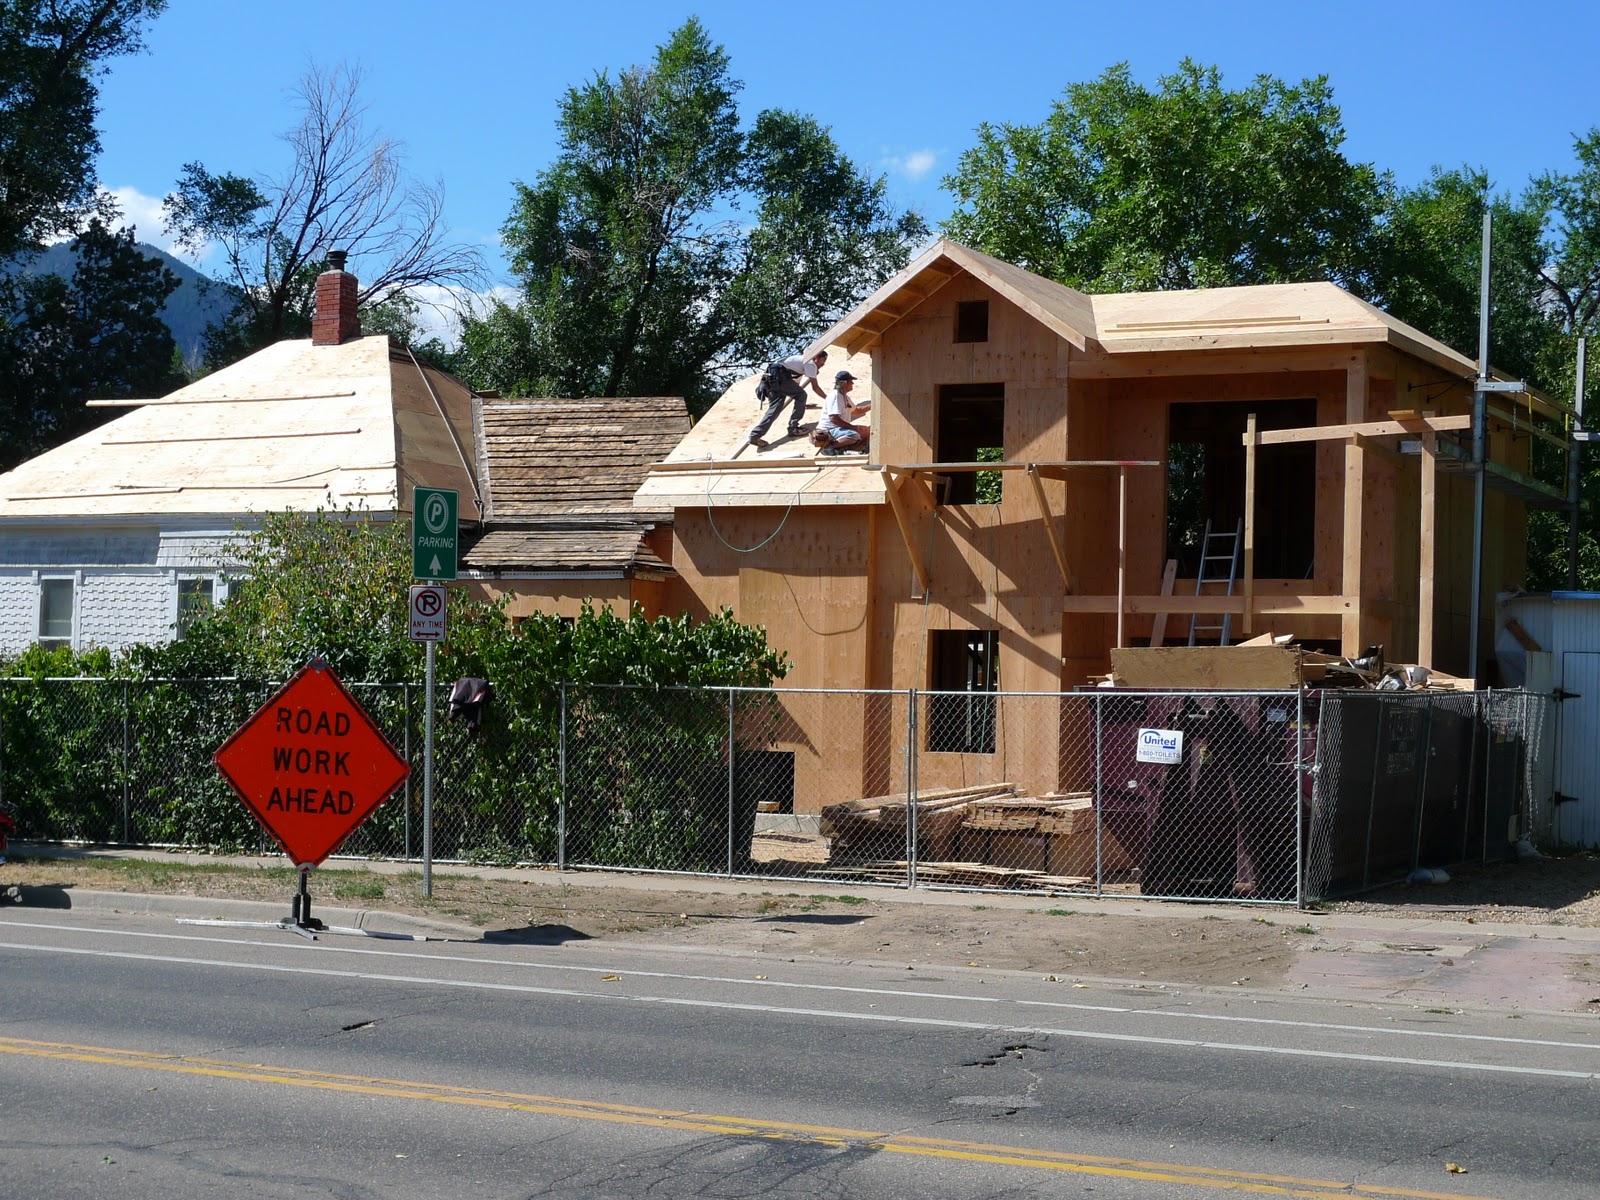
It might look like pick-up-sticks from this perspective, but framing has begun and the house is taking shape. The floor over the basement is in place and the exterior walls are about to go up.

Floor Over the Basement and Historic House

Let’s do this the right way – let me take you through the front door and introduce you to the floor plan. As you enter through the front door, you step into the ‘great room’. We’ll have our kitchen off to the left with a large island and a dining area. Straight ahead will be a fireplace and seating area centered around the double windows that were once part of the old dining room.

Entering the House

The Great Room

I am particularly excited about the insulation. The house had no insulation. Can you imagine living in a house with no insulation and a stove for heat? That’s the way it was ‘back in the day’. Of course, there was a gas furnace installed at some point in time; however, it’s not too efficient without insulation. This blown-in insulation in the crawlspace will help keep our heating costs under control.

Blown in Insulation Under the Floorboards

There is a hallway at the far end of the room that leads to the bedrooms, laundry, stairs to the upper and lower levels, and ultimately to the garage. The original house sits high on its foundation and the new addition is at a lower grade. Three steps down takes you to the new wing.

Entering the New Wing

The east bedroom is the guest bedroom.  It's small – very small – but I like to refer to this room as the “room with a view”. Just outside the double windows is a petite tree and beautiful lilac bushes. This is the area of the yard where we will plant a garden.

The Room with a View

Just opposite the east bedroom is a bath and just down the hall is the west bedroom. This bedroom has lots of windows and an attached bath.

The West Bedroom

At the end of the hallway is the laundry room/mud room. It will also accommodate the furnace and provide much-needed storage space.  The area under the washer and dryer is recessed and will include a drain.  We are hoping we will never experience a water leak; but if it happens, we are prepared!

Recessed Pan for Washer/Dryer

Looking back, you can see the elevation difference between the old and new sections of the house. 

View from the Garage Door to the Front of the House

And finally, this is the compact, single-car garage. Did you notice how clean the job site is? Meticulous!!

The Single Car Garage

Monday, September 6, 2010

Reinforcements

With the basement walls erected, the crew began to put the floor joists into position on the north part of the house. This new wing construction is a stark contrast to the construction techniques used at the turn of the 20th century.

New Addition Floor Joists

To begin framing in the old part of the house, it was first necessary to reinforce the structure. The floor was supported by a hodgepodge of tree trunks, stone mounds and brick columns. New steel columns were installed beneath the floor and the old floorboards were buttressed with new lumber.

Concrete Pads to Support New Columns

Strengthening the Floorboards

One large 25' x 25' room will be created from the space that once contained the living room, parlor, dining room, bedroom and bathroom.  With no walls supporting the weight of the roof, a steel beam was placed to carry the load.  The beam runs the length of the house to where the new construction begins.  Like the floorboards, the ceiling joists also needed to be supplemented.

Structural Steel Beam

Ceiling Joists

The chimney is located in the center of the original structure.  The new fireplace will be positioned along the north wall and the old flue is being abandoned.  The original chimney was preserved to protect the integrity of the home's exterior.

The Chimney is Shored Up

The final touches to tie the original structure to the new addition is accomplished by repairing the foundation that was removed under the old porch.  Care was taken to match the appearance of the original flagstone and an aging process will be used to blend the old with the new.

A New Footing Under the Old Porch


Concrete is Poured

New Flagstone Foundation